
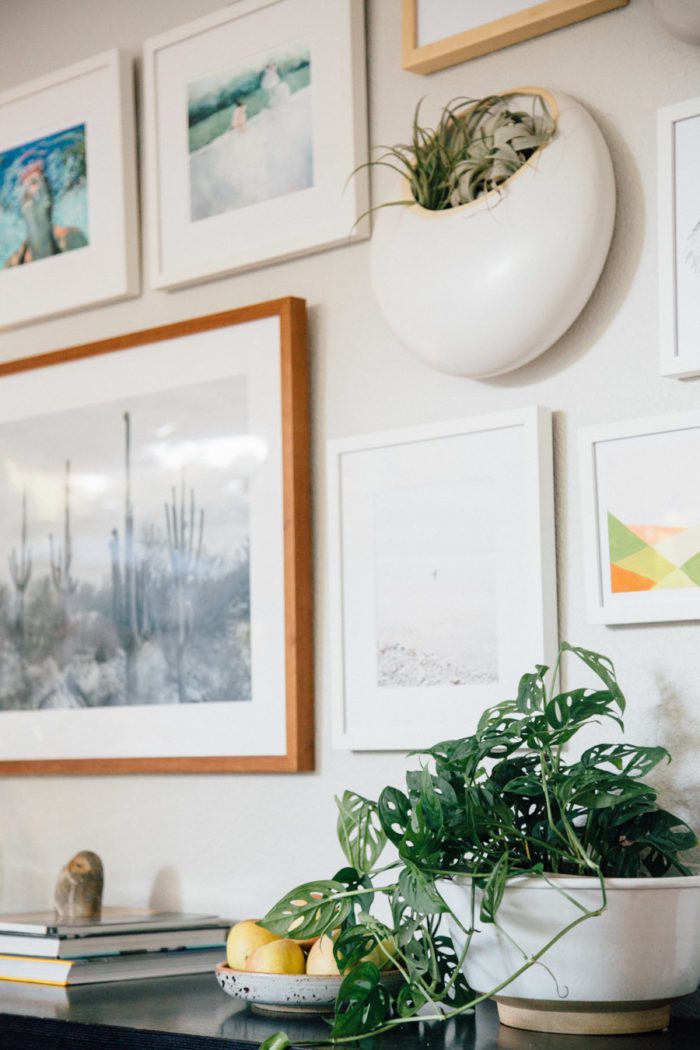
There’s one wall in our dining room that rarely appears in photographs. It’s not that’s it so horrible; it’s just that it has never felt finished.
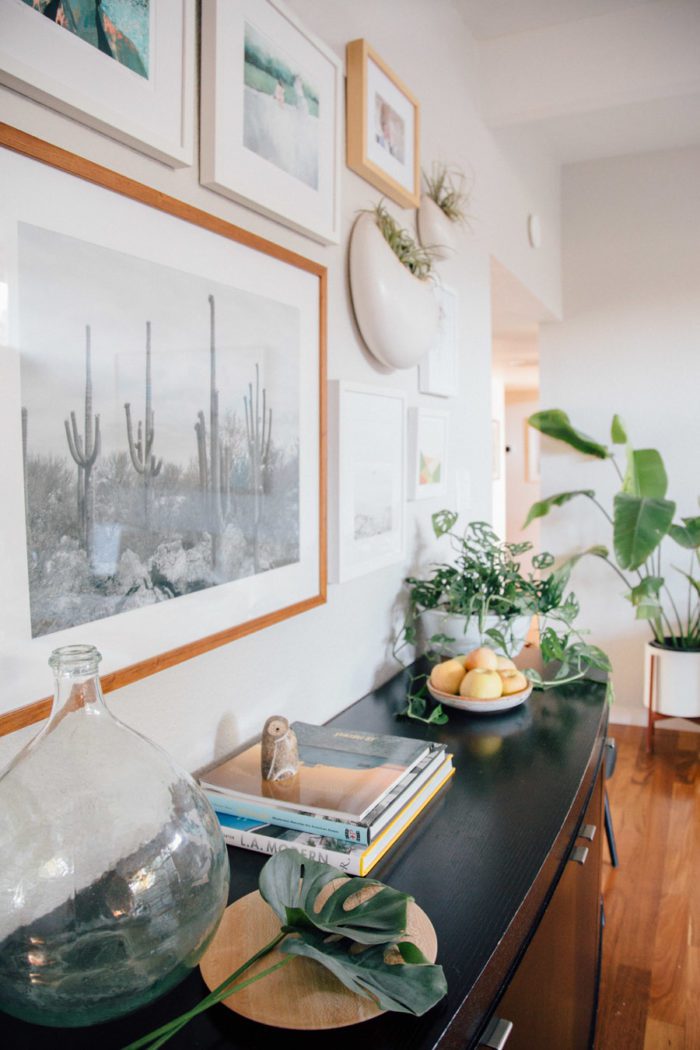
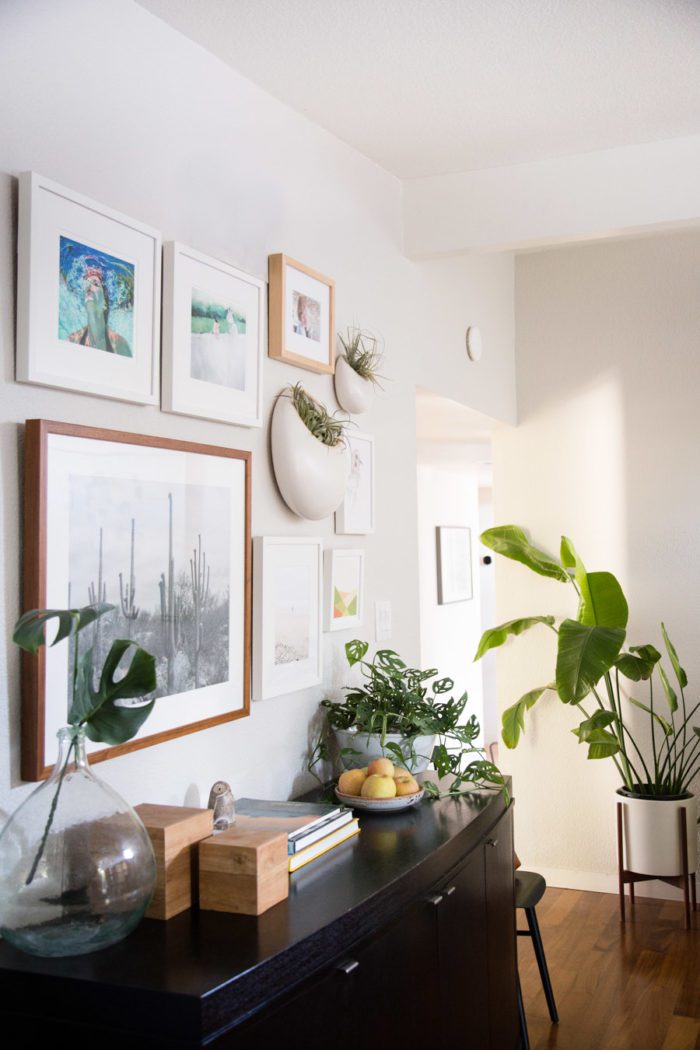
The furniture—a large black credenza that holds all of our wine glasses and wedding china—is a tad heavy for the room and seemed to fit our style in New York better than in California. And then there’s the wall—which has felt a little empty. On one side of the room, there’s a massive photograph (the photo of the photo of Richard Prince’s famous photo, to be exact); on the other there’s a very large painting. So what to do with this wall? It seemed too much to have another large image. And we’re not sure we’re ready to commit to a new storage piece (that could incorporate shelving). I’d been thinking about installing a gallery wall there for a while and had slowly been collecting a few prints, here and there, to one day have framed. One day… going on two years…
But holidays are a time when—with guests around, with more photos being taken, more meals in that less-used room, etcetera—you tend to see the house through fresh eyes. Thanksgiving, Christmas, New Year’s… it’s all coming so fast! It was time to pull out those items I’d been meaning to hang so the dining room could feel a bit more “finished”—before hosting another meal.
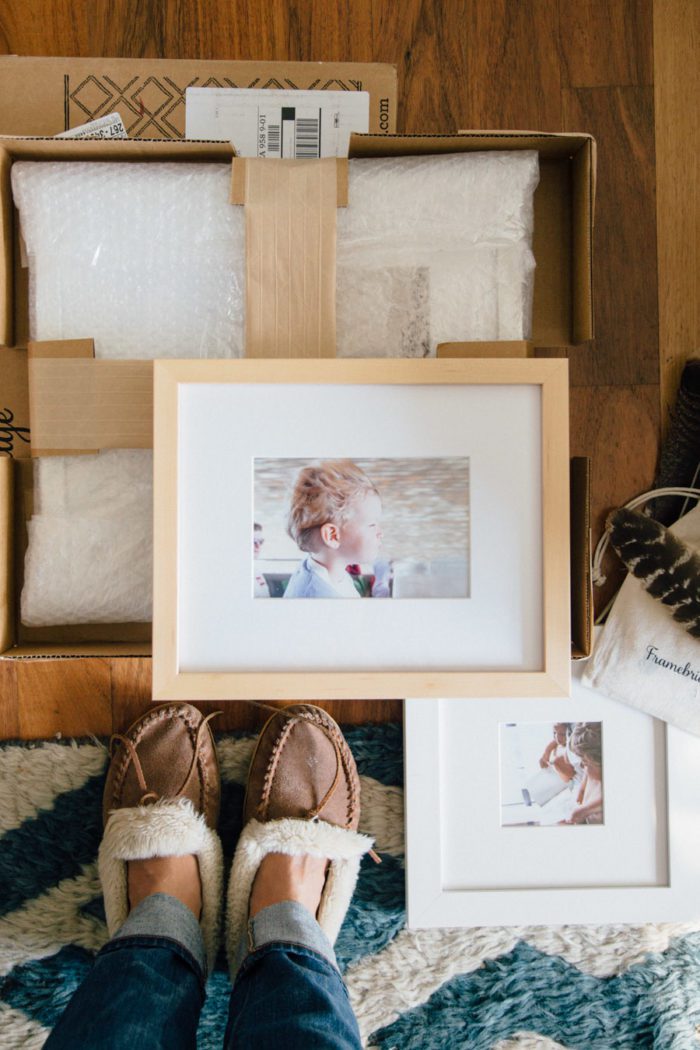
I used Framebridge to have everything I’d been collecting (and a few new pieces) framed in one fell swoop: they custom frame your art and ship it directly to you, hanging hardware and all. It made life a lot easier. Framebridge was kind enough to provide some product and sponsor this post; regardless I’d recommend them without hesitation. Here are some more details about the dining-room update and putting together the gallery wall…
You can either mail your art to the Framebridge studio (they provide prepaid packaging) or upload an image for them to print. I did a combination of the two.
That photo of Hudson, above, was taken on a Bateaux Mouche in Paris when he was two. It has always made us smile—he’s like a puppy dog, leaning out the car window!—so I sent them the file to print. I also uploaded an image directly from Instagram. (I ended up saving that piece for my bedside.)
I wasn’t sure how everything would go together, so I just chose to frame my favorites in either white or simple wood frames. But there’s a large range of options on the site. They’re also willing to make suggestions, if these kind of decisions aren’t your forté.
They use a UV-protective acrylic rather than glass, which seemed nice for a wall that gets direct light from opposing windows. We actually have acrylic in our two largest framed pieces because it brings down the weight a lot and made them easier to hang. And there were other nice touches, like a little envelope on the back for the artist’s certificate, and high-quality hardware.

Equally important, I thought the pricing was good. Framing is expensive! (It’s also hard! When I was in college, we had to learn how to build frames and cut mats in art class and I knew it would always be a service I’d be willing to pay for to have done right.) For a large piece, it’s easy to spend more than the value of the art. Framebridge’s prices start at $39, and they will frame up to a 32″ x 40″piece for $159.
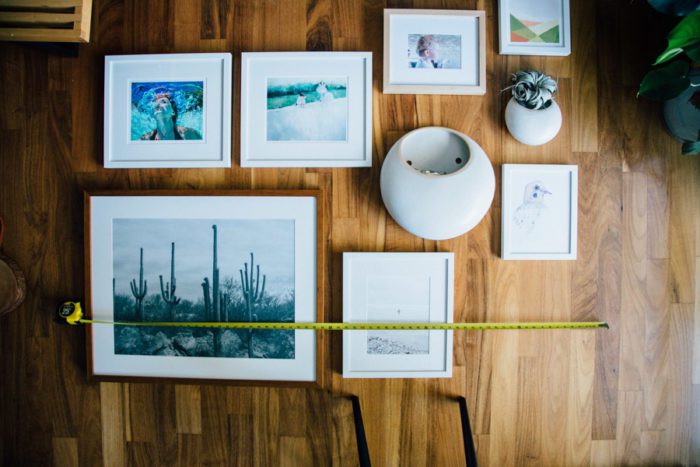
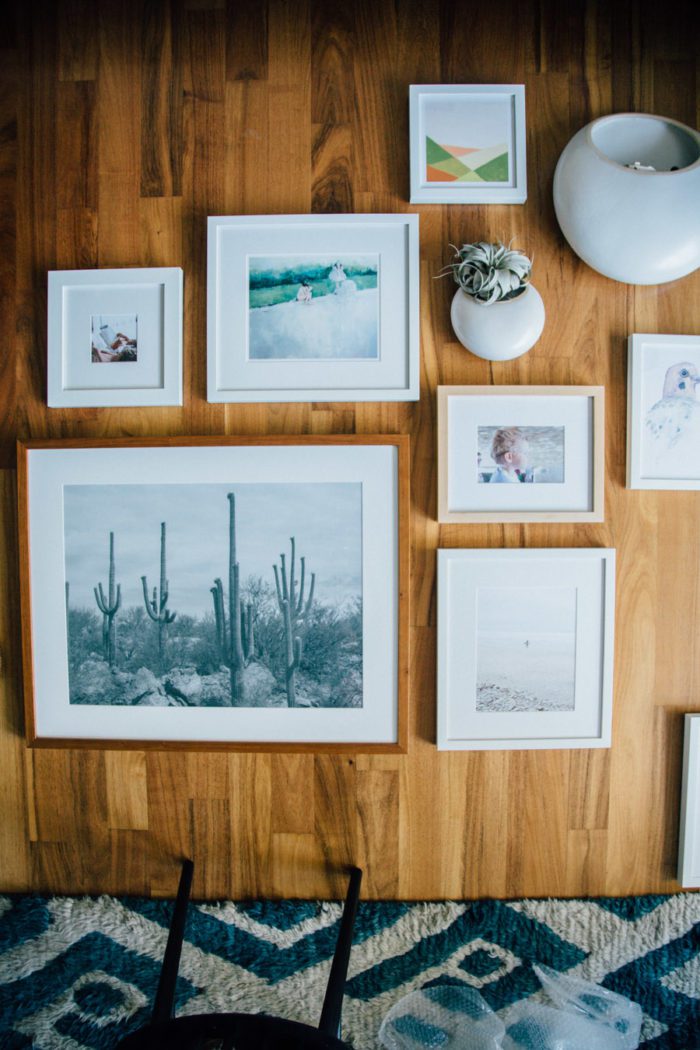
I’ve shared a great trick for planning and hanging a gallery wall in the past, but the first step for almost anybody is just laying everything out on the floor. From there you can make the rules. For this project, I decided I want to somewhat follow the line of the ceiling. I started with the largest piece and then added the rest around it, leaving 2-1/2″ gaps around most items. Once I had a general idea of where I wanted things, I got out the tape measure to be sure I’d not gone too wide. I also took a photo to refer back to for reference.
In general, it’s recommended that the mid-point or focal point of your collection is hung at eye-level which, on average, tends to be 57-60″ off the ground.
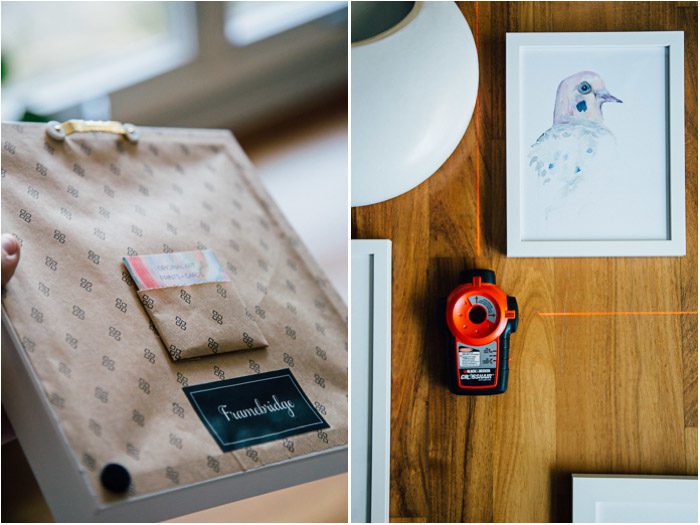
A pencil and a ruler is all one really needs, but I love having a laser level for jobs like this. (Tip: If you don’t have a level but need some straight vertical guide-lines, you can tie something heavy to the bottom of a string and let gravity help you. A roll of painter’s tape, unfurled to hang down works, too.)
To figure out where the nail goes, you’ll need to measure the frame: first, find the midpoint by measuring across and dividing by two; second, measure vertically and subtract any space between the top edge and the wire or hanging loop/ledge. Mark the intersection of those two things. (Note: If the wire is hanging from a hook below a nail, be sure to hold the hook in place at that point and mark how much higher to place the nail.)
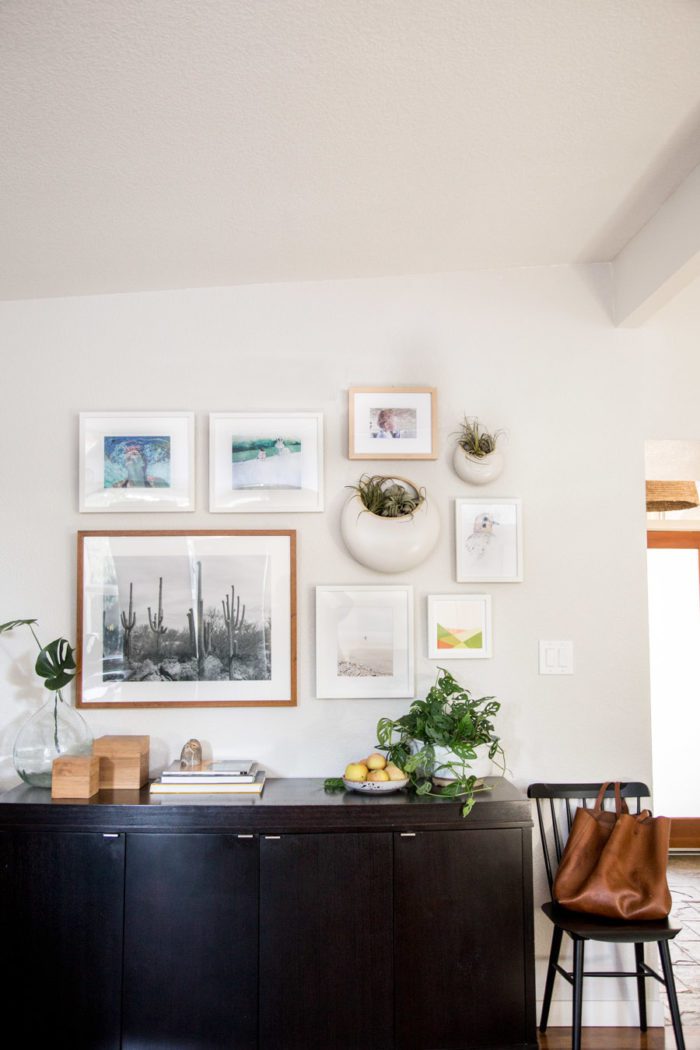
I like to stand back and take quick phone photos to see how it’s coming together—it helps me to get a little distance. It takes a little patience, but it’s so rewarding once it’s done!
Any projects you’re inspired to finish?
Framebridge is giving readers 20% off their first order with the code HITHER20 through the end of January.
[Featured art sources: Desert Poster |Breakthrough by Samantha French |In the Suburbs by Kiki and Polly |Hudson on the Seine (my own photograph) |Mourning Dove by Fin and Feather Art |Sunrise by Brenna Giessen |Haskell’s by Tessa Neustadt | Planters by West Elm ]This post is sponsored by Framebridge. Thank you for your support!


22 Comments